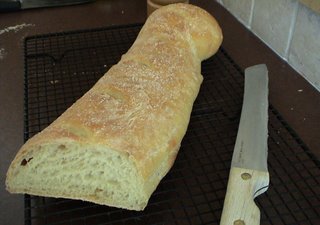
 My interest in making my own bread (beyond the regular sandwich type) really started after we'd been away from Ann Arbor, Michigan (and Zingerman's) for nearly a year, and I was growing painfully aware other breads in the area weren't going to satisfy my need for European-style loaves. Not that I've even been to Europe, mind you, but I've tasted bread enough to know what a good loaf is supposed to be. So, my appetite was piqued, and I started researching. There are several places on the web to get started, my main resource for a time being The Artisan, a great place to grab some recipes and get started, followed by the extraordinarily educational videos of Julia Child with Nancy Silverton and Danielle Forestier. The Julia Child site was probably where I learned the most about technique. I also checked a couple of books out of the library, learning by gathering bits and pieces of information all over the place.
A few qualities were essential to me in achieving the bread I longed for: a well-defined crust, a good crumb, and a developed flavor usually unattainable in one day. For the flavor, a sourdough does the job nicely, but I prefer the 2-3 day versions of developing flavor, though it takes some practice to do it well. The crumb takes a good amount of kneading (thank you to my large KitchenAid mixer) and the right amount of rising, which should continue in the oven. For this to happen, I always place a large cast-iron skillet on the bottom rack of my oven at least 10 minutes prior to baking, then I pour 1-2 cups of water in it just after adding my loaves to the oven. This keeps the dough from forming a crust early on in baking, allowing it to rise for a longer period in the oven - you know that last little amount that you can't let happen on the counter or it falls when you move it. The humidity also helps the bread to form a good strong crust toward the end of baking.
My other trick is to always bake bread on a stone, something nice and thick, at least an inch or so, allowing it to preheat in the oven 45 minutes before baking, so it's completely to temperature. In case you're wondering, that handy round baking stone you bought at Target or Pampered Chef is way too meager for this task. It will do if you're stubborn, but if you're just cheap like me, then go to your local all-purpose home store and grab a couple of Saltillo tiles, Mexican terra cotta unglazed tiles, for under $2 each. Then, if they break because you poured water on them while they were hot, you won't get all worked up. But I always bake on parchment paper, as the tiles are not food-grade.
So, the point of this whole exposition is to announce that I have a recipe I like that only takes ONE day to make. Granted, it takes the whole day, but I can start it around 9 am and have it with dinner, which doesn't require too much planning ahead. I was greatly helped in coming up with this by Joan Nathan's The New American Cooking, a book I really enjoy but have not used enough of yet to give you a definitive review. This is my version of the bread:
French Bread
I know, exciting title.
1 t. active dry yeast
1 t. sugar
3 c. warm water
about 7 c. bread flour
2 t. Kosher salt
olive oil, for brushing
Dissolve 1/2 t. yeast and 1 t. sugar in 1 1/2 c. water, then stir in 1 cup of flour until fairly smooth. Cover tightly with plastic wrap and let rise for 3 hours.
Stir the remaining water and yeast into the sponge, then add 5 1/2 c. flour, 1 t. salt, and all the sponge to the bowl of a standing mixer. With the dough hook in, knead the bread for 10-15 minutes, adding a bit more flour as needed to make a cohesive but fairly loose dough, slightly sticky when touched.
Coat a large bowl with cooking spray and transfer the dough to the bowl, covering tightly with wrap. Let rise for another 3 hours. Preheat the oven to 450 degrees with the stone or tiles on the center rack. Be sure to place a heavy skillet on the lower rack at least 10 minutes before baking.
Turn the dough out onto a lightly floured surface and divide into two equal parts. Shape into two baguettes on a piece of parchment paper (doesn't need to be floured) set on a peel or large movable surface (I use a large wood cutting board). Snip the loaves with a pair of scissors about 5 times across the top at an angle, then brush the tops with olive oil and sprinkle on the remaining salt. Let the dough rise until it can rise no more (should feel very light to the gentle touch), about 45 minutes to an hour.
Slide the baguettes and parchment onto the stones, then carefully and quickly pour 1-2 cups of water into the skillet. Close the oven door and keep it closed during baking to preserve the steam. Bake until well-browned, about 25 minutes. Remove to cooling racks.
Enjoy!!
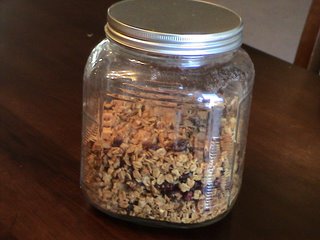
 Mark is funny. He goes through phases with his breakfast item-of-choice, and often uses one option day after day until he's sick to death of eating it. Then he'll want the next item on his list until he's worn that one out. He's been asking me for a few days to make him granola, which I periodically do, and he finally mentioned yesterday that he doesn't really like breakfast anymore - a sign that he definitely needed a change of pace. I got to work.

